hosted services
For some time I have done what I see as relatively simple, 'photoshop' with GIMP. However, some people may not have access to PhotoShop or PaintShop Pro from Jasc Software.
I'm now going to give an overview of what I do when I want to 'photoshop' an image. Perhaps I should call it GIMPShop more often.
Steps
get original image
This can be done using a URL simply by opening GIMP and going to 'File -> Open Location ...', or if you have the file on disk already you can choose it from the disk using 'File -> Open...'. However you choose to get your original data is up to you. Lets just get a source image open to begin with though.
get target image
See above. This image will be where you place your cutting out.
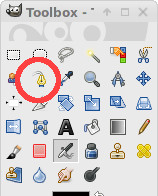
use path tool on the original image
You can find the path tool by pressing B on the keyboard or by using the tool from the toolbox that look like a fountain pen nib.
The path tool allows you to select areas that you want to isolate. Generally speaking just click around the edge of the person or object, trying to keep the path as close to the object as you can.
Once you've gone all around the object you can then turn your path into a selection. To do this go to 'Edit -> Select from path'.
You should now have a good object that you can copy and place in another photo. We'll call this your 'floater'.
insert the floater
The best thing I've found here is to paste the floater as a new layer. This has many advantages since you can continually interfere with this floater without touching the target image.
To do this, goto 'Edit -> Paste as -> New layer'. You'll see this in the layer dock.
layering
Sometimes your selection will be above items which it should be below. To solve this issues you will need to go back to the original image.
You'll need to use the path tool again to outline those image parts which need to be above your floater.
Once outlined, turn the path into a selection, copy and paste as a new layer, as above.
Sit back, admire or touch up, perhaps lighten in some areas and darken in others. The spray can can help with this.